


The key to flawless airbrushing is keeping your equipment spotless. The best airbrush cleaning kits in 2025 combine brushes, needles, cleaning pots, and safe cleaning solutions to remove dried paint without damaging delicate parts. Kits from brands such as Iwata Medea, Master Airbrush, and Paasche suit beginners, hobbyists, and professionals. This guide compares the top kits, explains how they work, and offers expert maintenance tips so your airbrush sprays smoothly every time.
A well-maintained airbrush delivers consistent, controlled paint flow. Even a trace of dried paint can cause sputtering, clogging, and irregular coverage. Cleaning may sound tedious, but it’s the most important step in keeping your airbrush performing like new.
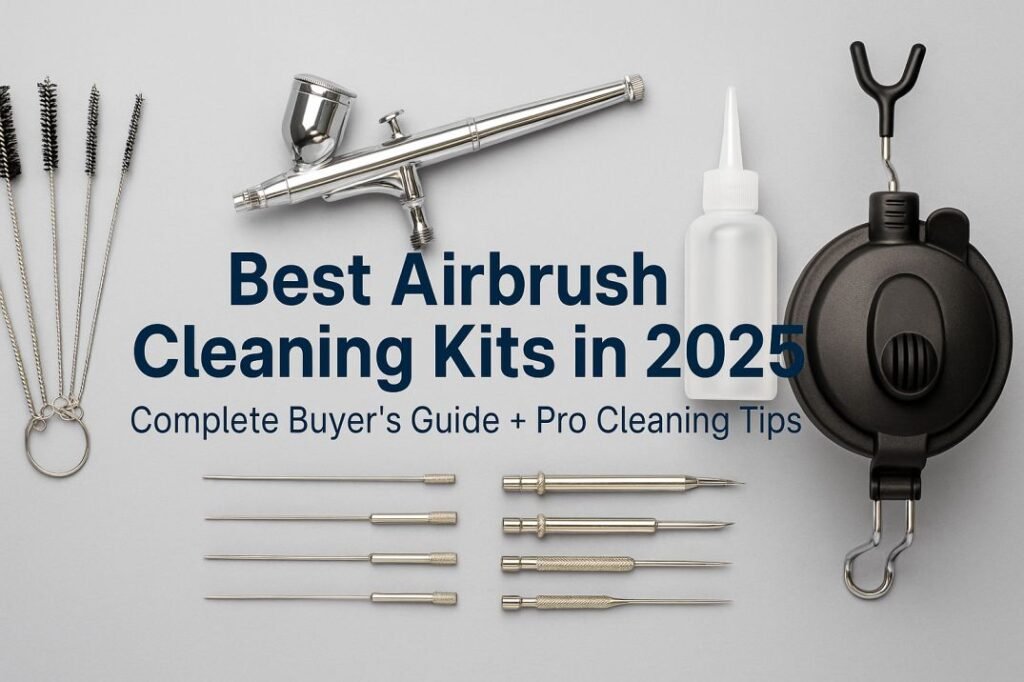
An airbrush cleaning kit saves time and prevents damage by providing purpose-built tools: fine brushes for internal passages, reamers for the nozzle, a cleaning pot to trap overspray, and fluids that dissolve residue safely. In this guide you’ll learn why cleaning matters, what each kit includes, which products stand out in 2025, and how to clean your airbrush correctly.
Why Cleaning Your Airbrush Matters
Airbrushes rely on precise airflow through narrow channels. Paint dries quickly, especially acrylics, and residue accumulates inside the nozzle, needle channel, and trigger assembly. As deposits build up, the airflow becomes uneven, paint atomization deteriorates, and eventually the airbrush stops spraying entirely.
Regular cleaning removes paint particles before they harden. It prevents corrosion, protects seals, and extends component life. A clean airbrush also maintains accurate color mixing and spray consistency—essential for both hobby and professional work.
How Airbrushes Become Clogged
Clogs usually result from dried paint inside the nozzle or on the needle tip. Thick or poorly thinned paints, infrequent cleaning between color changes, or long pauses between uses make the problem worse. Environmental factors such as high temperature and low humidity accelerate paint drying. Leaving paint in the cup after finishing a project nearly guarantees a blockage the next time you spray.
Understanding these causes helps you choose the right cleaning routine and tools to avoid them.
What’s Included in an Airbrush Cleaning Kit
Although contents vary by manufacturer, most complete kits include:
-
Cleaning brushes: Small nylon or brass brushes sized for the nozzle, cup, and paint passages.
-
Cleaning needles or reamers: Fine metal rods for removing stubborn dried paint inside the nozzle.
-
Pipe-cleaners: Flexible cleaners for narrow air channels.
-
Cleaning pot or jar: A sealed container for spraying out cleaner and collecting waste safely.
-
Cleaning solution: A solvent or water-based liquid formulated to dissolve paint residue.
-
Pipettes or droppers: For applying cleaner precisely into small openings.
-
Lubricant or wrench: Often included in professional kits for fine adjustments.
-
Storage case: Keeps everything organized and portable.
These items allow both quick color-change flushes and deep cleaning after longer sessions.
Types of Airbrush Cleaning Kits
-
Basic kits – Include brushes and needles for simple maintenance between uses.
-
Maintenance kits – Add a cleaning pot, stand, or cleaning fluid for thorough end-of-day cleaning.
-
Professional kits – Produced by major brands; include branded cleaners, lubricants, and precision tools for heavy use.
-
Single-purpose accessories – Such as stand-alone cleaning pots or nozzle-specific tools that supplement existing sets.
The right choice depends on how often you spray, what paint you use, and your budget.
The Best Airbrush Cleaning Kits of 2025
1. Iwata Medea Airbrush Cleaning Kit – Best Professional Choice
This premium kit is designed by Iwata for professional maintenance. It contains the Medea Airbrush Cleaner, thread sealer, miniature brushes, pipe-cleaners, nozzle wrench, magnifier, lubricant, and step-by-step instructions.
Pros: Complete tool set, professional-grade quality, includes cleaner and lubricant.
Cons: Higher cost than general-purpose kits.
Verdict: Ideal for serious artists and studios that rely on precision and durability.
2. Master Airbrush 13-Piece Cleaning Kit – Best All-Round Value
The Master Airbrush kit offers a balance of quality and price. It includes a glass cleaning pot with holder, five cleaning brushes, five cleaning needles, and a wash needle. The pot doubles as a convenient stand during use.
Pros: Excellent value, includes cleaning pot, suitable for most airbrush brands.
Cons: Brushes may wear faster with heavy use; cleaning fluid not included.
Verdict: A reliable mid-range option for hobbyists and semi-professional users.
3. Paasche AC-7 Airbrush Cleaning Kit – Best for Beginners
Paasche’s compact seven-piece kit provides the essentials for quick cleaning. It includes brushes and needles that fit most airbrush designs.
Pros: Affordable, straightforward, from a trusted manufacturer.
Cons: No cleaning pot or fluid; limited accessories.
Verdict: Perfect entry-level set for new airbrush users who want simple, dependable tools.
4. SAGUD Airbrush Cleaning Pot Kit – Best Budget Accessory
This inexpensive kit centers on a durable glass cleaning pot with a rubber-sealed lid to contain overspray. It includes a holder for resting the airbrush between colors.
Pros: Very affordable, easy to use, effective for flushing between colors.
Cons: Does not include brushes or cleaning needles.
Verdict: Great supplementary tool if you already own brushes and cleaner.
5. ILSMYSUTRA Portable Airbrush Cleaning Kit – Most Compact Design
The ILSMYSUTRA kit combines a cleaning pot, brushes, and basic accessories in a lightweight case. Its compact form makes it ideal for small studios or travel use.
Pros: Portable, organized, easy to store.
Cons: Fewer tools than larger sets.
Verdict: Convenient choice for artists who need mobility or limited workspace.
Explore More: Carpet Cleaning Cannock | Professional, Affordable Local Experts
How to Use an Airbrush Cleaning Kit
-
Disconnect the airbrush from the air source.
-
Disassemble the nozzle, needle, and paint cup carefully.
-
Rinse major parts with cleaner to loosen residue.
-
Brush the cup, nozzle, and channels using the appropriately sized brush.
-
Clear stubborn buildup with a cleaning needle, inserting it gently.
-
Flush the airbrush by spraying cleaner into a cleaning pot until it runs clear.
-
Dry components with a lint-free cloth.
-
Lubricate the needle or trigger mechanism if required.
-
Reassemble the airbrush and test spray water or cleaner to confirm even flow.
Avoid soaking the entire body in cleaner, using metal picks that can scratch, or forcing tools into delicate openings.
DIY Airbrush Cleaning Solution (for Water-Based Paints)
You can make an effective homemade cleaner using:
-
50 percent distilled water
-
25 percent isopropyl alcohol (70 percent strength)
-
25 percent ammonia-free window cleaner
Mix and label the bottle clearly. This works well for acrylic and other water-based paints but should not be used with solvent or lacquer paints.
How Often to Clean Your Airbrush
-
Between colors: Flush immediately to prevent cross-contamination.
-
After each session: Perform full cleaning and drying.
-
Weekly (heavy use): Deep clean with brushes and reassembly.
-
Monthly: Inspect seals, lubricate parts, and check alignment.
Frequent light cleaning is better than occasional heavy scrubbing—it prevents buildup and mechanical wear.
Maintenance Tips and Common Mistakes
Do:
-
Use the correct cleaner for your paint type.
-
Keep your tools organized and clean.
-
Lubricate moving parts sparingly.
-
Store the airbrush in a dust-free case.
Avoid:
-
Using plain water for tough residues.
-
Soaking the entire airbrush in solvent.
-
Forcing metal tools into tight spaces.
-
Reassembling while components are still wet.
Consistent gentle cleaning ensures reliable operation and longer equipment life.
Conclusion
A well-maintained airbrush is the foundation of precise, professional results. Regular cleaning not only preserves your equipment but also saves you time, money, and frustration. Choosing the right airbrush cleaning kit ensures you have all the tools you need to clean efficiently and safely.
The Iwata Medea Kit remains the best choice for professionals who demand premium quality. The Master Airbrush 13-Piece Kit offers the perfect balance of value and performance, while the Paasche AC-7 Kit provides beginners with a reliable, affordable option. For budget users or those who already own basic tools, the SAGUD Cleaning Pot Kit and ILSMYSUTRA Portable Kit are smart, space-saving additions.
No matter your experience level, regular maintenance with the proper cleaning kit will keep your airbrush spraying evenly, reduce clogs, and maintain top performance throughout 2025 and beyond.
Frequently Asked Questions
1. What is an airbrush cleaning kit used for?
An airbrush cleaning kit contains specialized tools and solutions designed to remove paint buildup from the nozzle, needle, and inner passages of an airbrush. Regular use prevents clogging, ensures even spray patterns, and extends the life of your airbrush.
2. How often should I clean my airbrush?
Ideally, you should flush your airbrush between every color change and perform a full cleaning after each painting session. For frequent users, a deep cleaning once a week is recommended to remove any hidden residue.
3. Can I clean my airbrush without a cleaning kit?
Yes, but using an official airbrush cleaning kit makes the process safer and more effective. The brushes, needles, and cleaning fluids are sized precisely for delicate parts and prevent accidental damage.
4. What’s the difference between airbrush cleaner and thinner?
Airbrush cleaner is made to dissolve dried paint and clean internal passages. Thinner changes the paint’s viscosity for spraying. Using thinner as a cleaner can damage seals or leave residue, so they are not interchangeable.
5. Can I make my own airbrush cleaning solution?
You can make a mild DIY cleaner for water-based paints using 50% distilled water, 25% isopropyl alcohol, and 25% ammonia-free window cleaner. Avoid this for solvent-based paints—use a commercial cleaner instead.
6. Why is my airbrush still spitting after cleaning?
Sputtering or spitting can occur if the needle isn’t seated correctly, if moisture is trapped inside, or if the nozzle is slightly damaged. Double-check the needle alignment and ensure all parts are dry before spraying.
7. Are all cleaning kits compatible with every airbrush brand?
Most universal cleaning kits fit common airbrush types. However, professional kits from brands like Iwata or Paasche are precision-matched to their own airbrush models for a perfect fit.
8. Is it safe to use an ultrasonic cleaner for airbrush parts?
Yes, but only for metal components. Never put rubber seals, O-rings, or plastic parts in an ultrasonic bath, as vibrations can cause damage.
9. What are the biggest airbrush cleaning mistakes to avoid?
Common mistakes include using plain water for cleaning, skipping cleaning between colors, forcing tools into tight spaces, soaking the entire body in solvent, and reassembling while parts are still wet.
10. How long should I soak airbrush parts in cleaner?
Usually, five to ten minutes is enough. Over-soaking can damage seals or remove lubricants. Always dry parts completely before reassembling.